Wed 10th June 2026 11:35:50
Windows Vista Day One
The Install
Confident that my C: drive was now error-free and in NTFS as required, I made some last-minute backups of my email folders, and Opera profile, then put the Vista DVD in and rebooted.
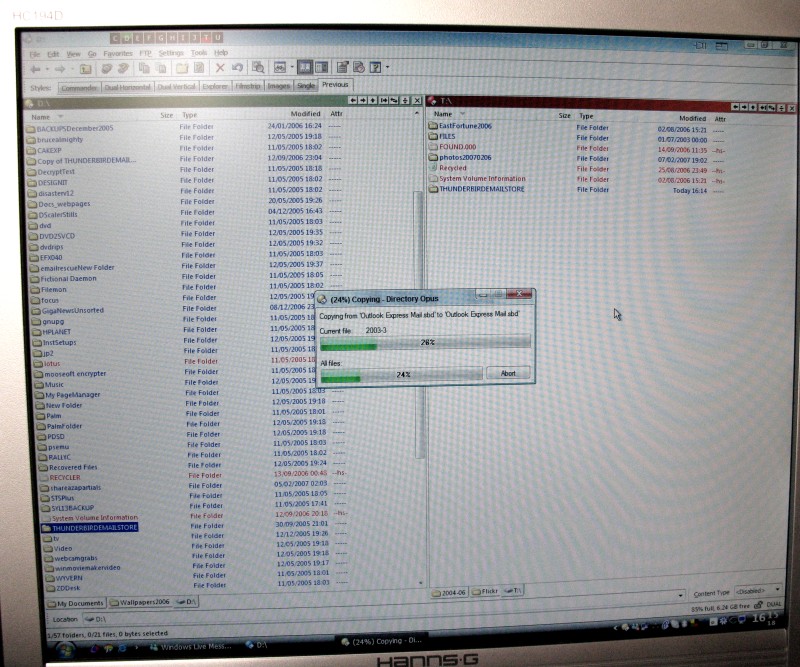
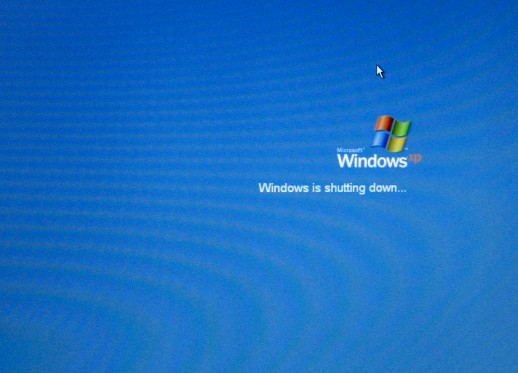
bye bye XP... for now anyway!
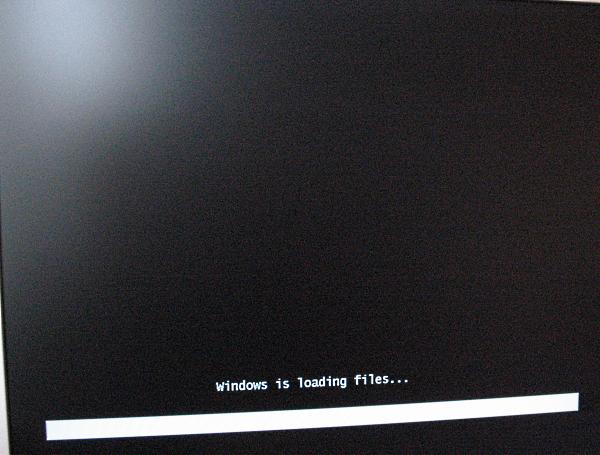
My Machine rebooted, went through the POST, then got to the “Press any key to boot from CD/DVD...” so I pressed a key and it started to run the DVD.
The first useful screen to display was the Language Select options. I selected for UK, and the UK Keyboard selection changed automatically.
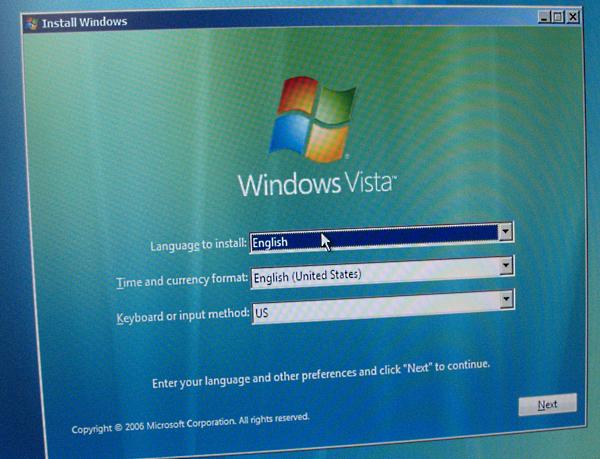
Clicked next and was left with a big window with “Install Now”.
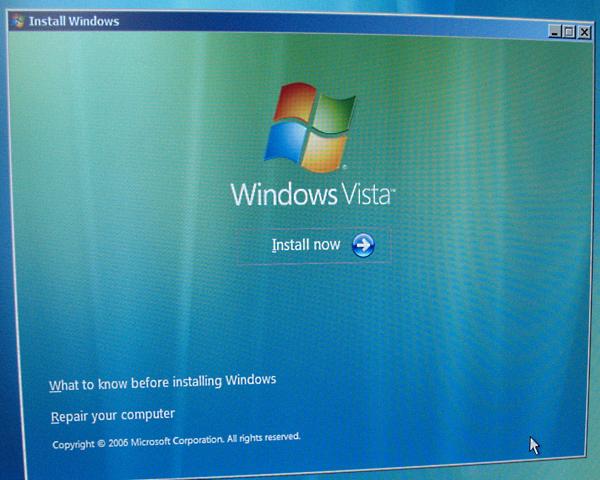
Presumably the “Repair your computer” link will open the recovery console or something similar. I think I’ll forgo trying it until I need to.
After a short delay and “please wait” while it presumably loaded the installation dialogs for English-UK, the Product Key window came up.
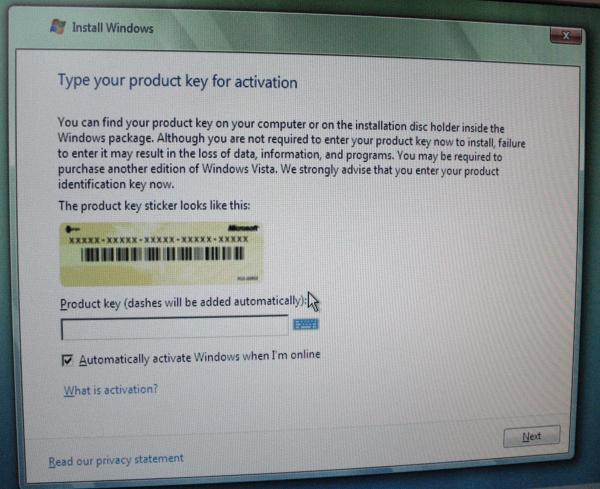
This is where Windows Vista greatly differs from previous versions. If you choose to type in the product key you received with your copy of Windows, the install automatically determines what version to install (Starter, Basic, Home Premium, Business Premium, Enterprise, Ultimate, and the N versions which have Media Player removed to comply with EU legal restrictions).
HOWEVER... entering the key is OPTIONAL at this time.
If you fail to enter the key, then Vista Install doesn’t know which version you’re installing (every version is included on the install disc regardless of the package purchased) so you need to choose.
I left out the key, and unticked the “Automatically activate Windows” box. Even if you have the key, it’s sometimes advisable to delay entering it and activation until you know your system is stable and won’t need re-installing, because a second activation will usually require a phonecall with Microsoft to explain why the same key is being activated again. Not entering any key will give you a 30-day trial in which to test Windows for stability.
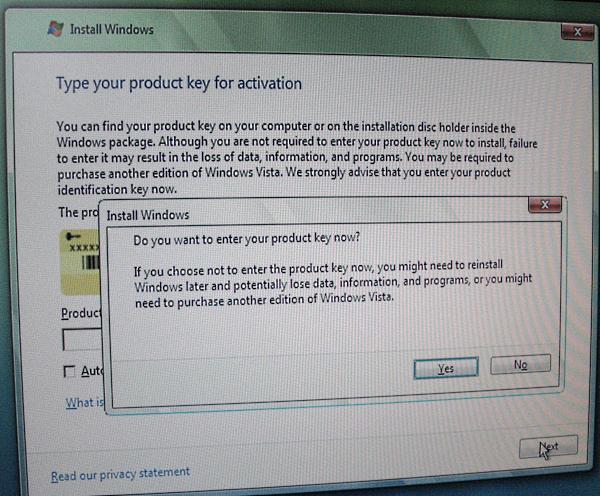
If you don’t enter a key, you get a warning saying that if you don’t enter the key, then you may need to re-install windows. This is because without the key, it’s up to the user to select the correct version of Windows to install. If you install, for example, Vista Home Premium but your (legally bought) key is for Home Basic, then you’re in trouble when the 30 days is up and you try to activate with your Basic key because Windows Vista won’t downgrade. The only (legal) solutions in this instance are to either go out and purchase the correct license (key) for the version you installed, or do a complete re-install from scratch... which is a pain in the arse especially if you spent that 30 days getting everything *just right*.
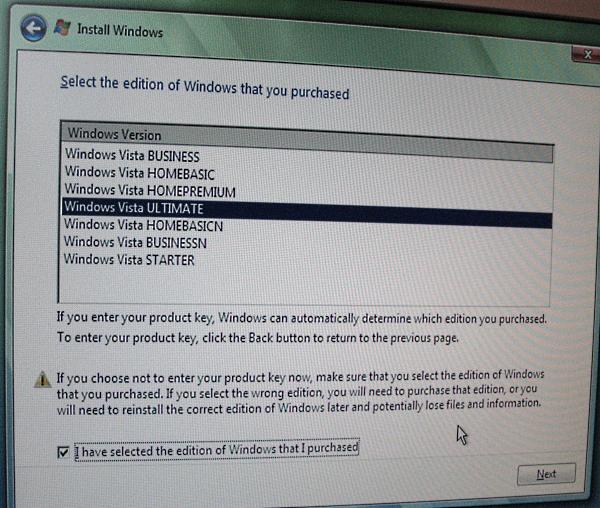
Once you’ve confirmed that you wish to proceed, you get asked which version of Windows to install.

Again is another warning telling you about needing to reinstall if you select the wrong version.
For testing purposes, I selected Windows Vista Ultimate, because it has all of the features available.
I ticked the box under the warning confirming I selected the one I wanted, then clicked Next...
Next is the obligatory End User License Agreement (EULA) that goes through all the legalese in telling you basically that only YOU are responsible for any data loss, damage or injury, and that Microsoft will always OWN the software. When you buy software, you don’t then own it, all you own is the right (license) to USE it.
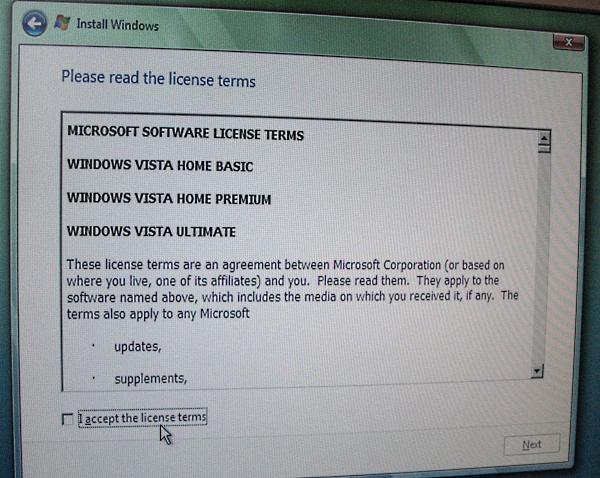
At least this one doesn’t require you to scroll down to the bottom to confirm you’ve read it all...
Clicked “I accept” seeing as it’s pretty useless otherwise...
Getting closer to the installation now and it’s prompting whether to do a clean install, or an upgrade.
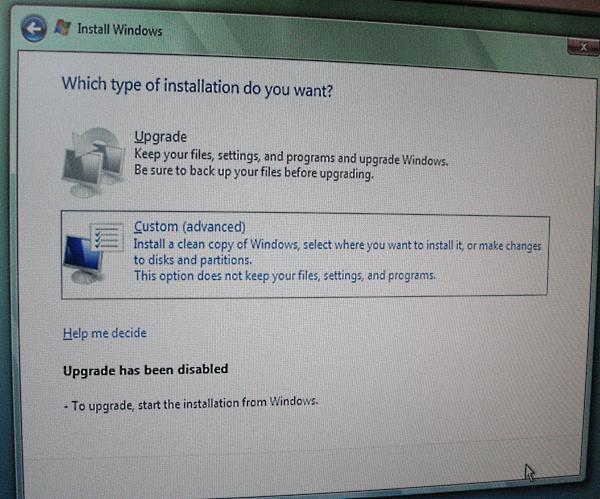
Because I booted from the DVD, it’s blocked me from installing an upgrade of my existing Operating System (Windows XP). To enable it, you have to run Setup from inside your old version of Windows.
If you’ve purchased the upgrade version of Windows, then I’m not sure what happens. Maybe you get the same options except if you do a clean install (booting from the DVD) then it’ll ask to supply your old Windows CD. There is a way around that but I won’t go into it. Let’s just say that Windows Vista will happily upgrade from itself as the older OS, and remember about the 30-day trial for no key! ;)
So, without any other choice, I clicked on the Custom (Advanced) install.
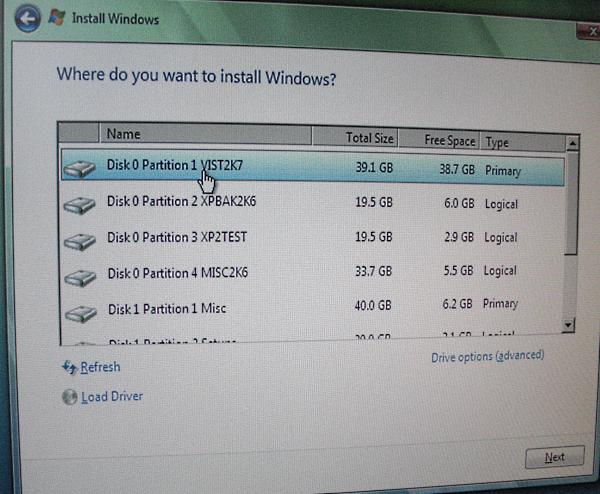
This is where you select which drive (partition) to install to. Most places suggest you need a 40GB drive with at least 15GB free space. I’d agree seeing as installing Windows Vista, Office 2007 and a few other programs has taken up about 16GB.
At first I was worried that it might need 15GB on *every* partition, for things like file indexing, system restore, file mirrors, but it doesn’t. The file index by default only includes the User folder and a few other places I can’t remember at the moment. It can be expanded to search all drives/folders.
This time it did let me install onto my C: drive, seeing as it was now NTFS. Don’t ask about the other partition’s names... they made sense when I originally made them!
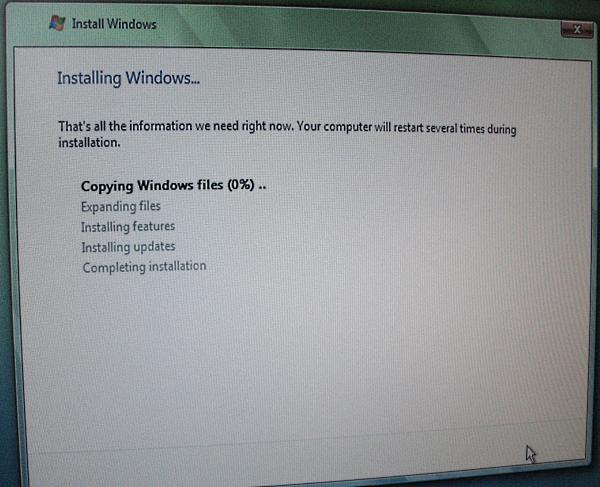
No turning back now! It’s copying the massive “image” of the file structure of Windows onto my C: drive. Rather than previous versions that extracted the files and copied them to disk one-by-one, Vista has the whole lot in one file, copied over, then extracted.
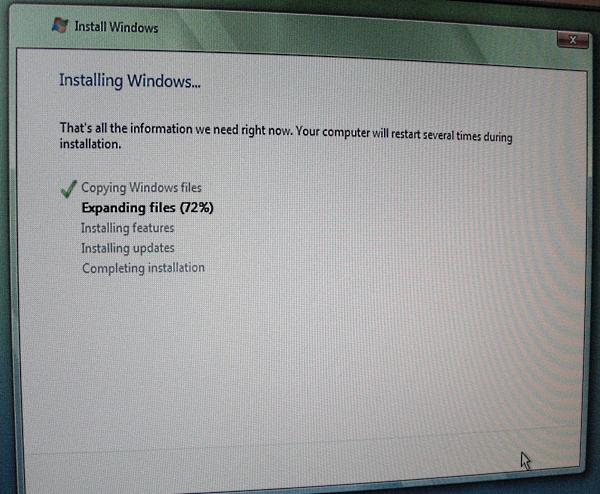
Now the big file is being decompressed and the files put in the right place.
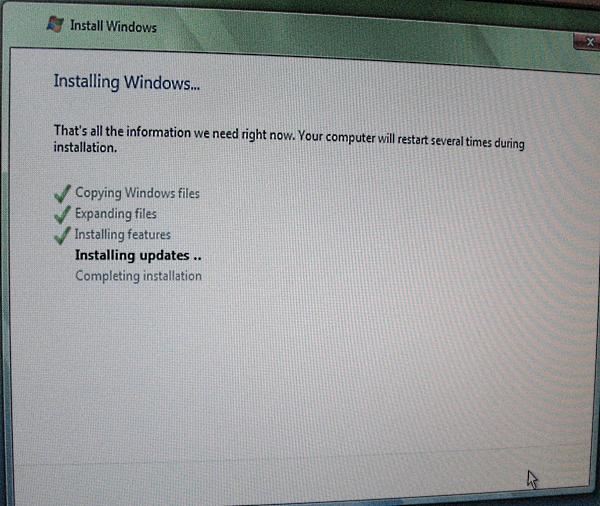
I’m assuming that “installing updates” means any service packs or hotfixes and the like that are included on a (future) install DVD. I’ve a feeling it’s not gotten to the “Do you want to go online to check for updates?” part.
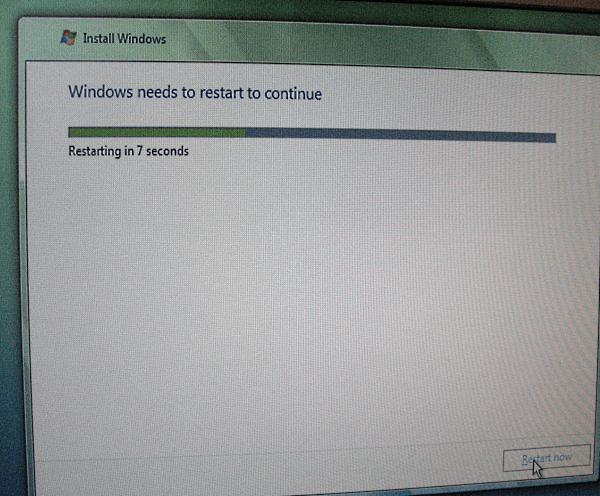
The first restart of the installation.
At the point where it asks to boot from the CD/DVD, DO NOTHING. It’ll carry on installing from what it’s installed on the boot disk. As far as I can remember, it flashed through the boot menu quickly and defaulted to the Vista install.
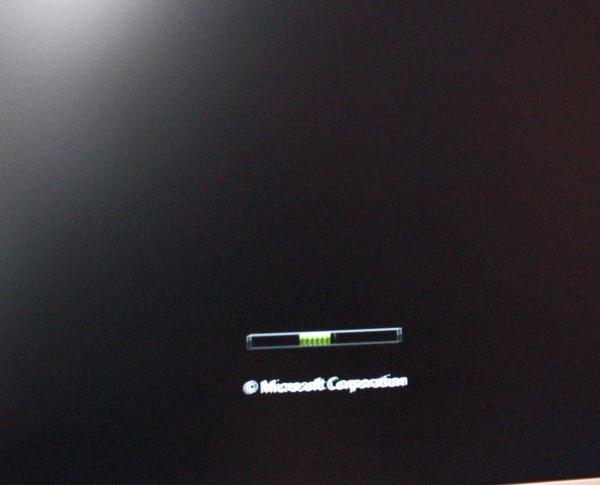
They could have done better with the bootscreen animation! The XP one’s far more interesting than this one! I suppose the idea is that you shouldn’t end up staring at this one for very long, if at all, seeing as Standby mode seems to be preferred over actual shut down.
Nearly there! This is about the first bit where you shut your eyes and pray that all goes OK!
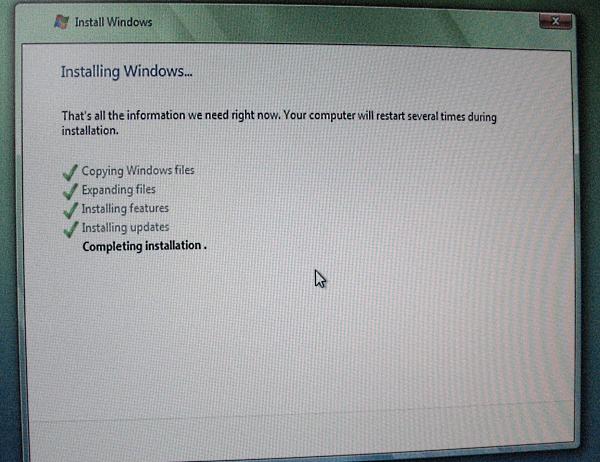
Then an anticlimactic sigh as this window re-appears...
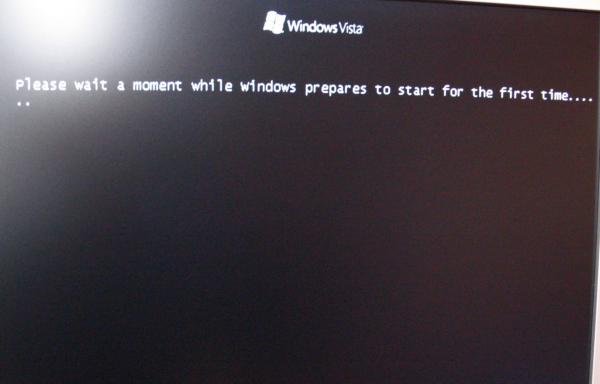
NOW it gets to the bit where it initialises your drivers and tries to run Windows as it should, day-to-day...

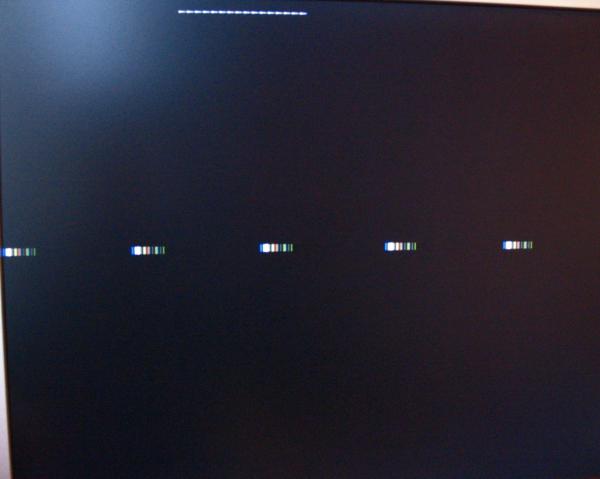
Oh Shit.... that can’t be good... surely?
Oh, okay... back here again then. I’m assuming that it played with my graphics hardware to check what resolutions it could do. In fact I think it could be my KWM switch that was being funny and making the pattern on screen.
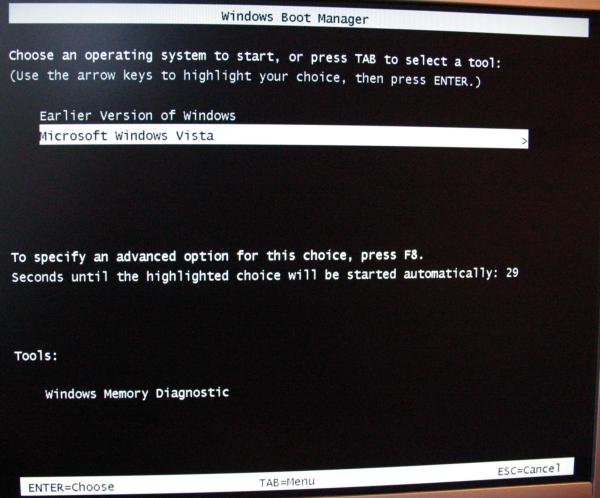
So it reboots again, and here’s the boot menu. Gives you the option of Vista or your previous version of Windows. The 30 second delay seems a bit long, although I suppose it doesn’t do any harm to give the user long enough to notice.

I had a look at the Advanced Boot options to see what it had.
I just carried on normally by selecting “Start Windows Normally”...
Another “oh.. shit...” moment, but then....

Getting closer....
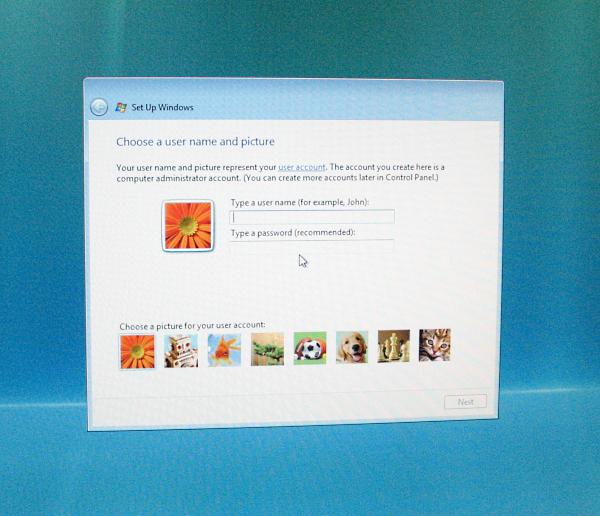
Yay! Now into the *real* Windows part!
It asks for a name for the first user. Usually this would be the *main* user, and this account is given “Administrator” privileges for installing programs, changing settings etc. It’s advisable to have a password set on this account.
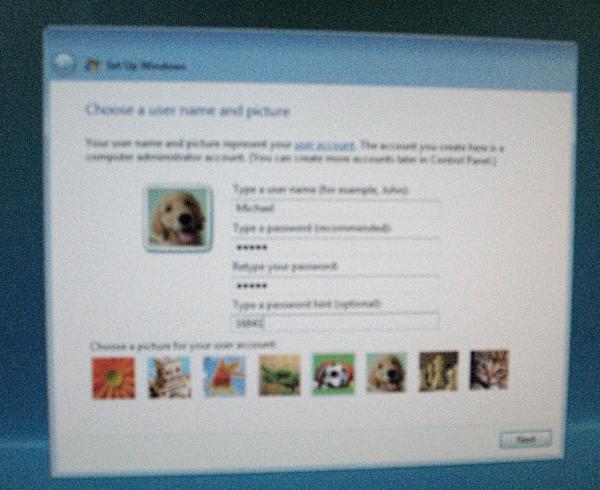
I put my name and a password on mine, and as usual it needs you to retype the password (just in case you mistyped it before) and put a password “hint” to give yourself a clue when you forget your password.
This screen also lets you pick a picture to go with your user account. I picked the puppy!
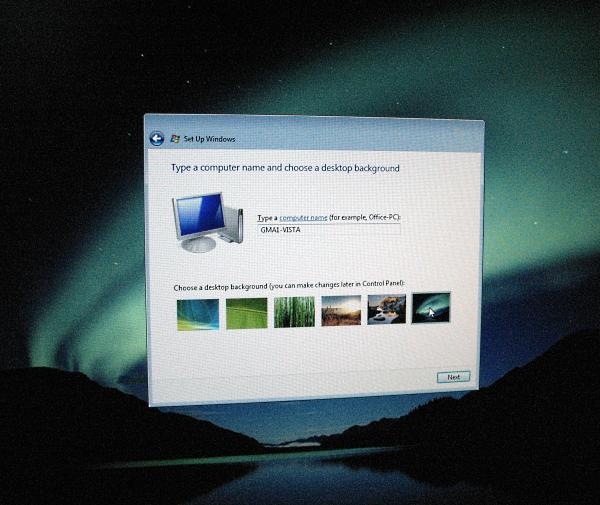
Next it asks for a name for the computer to show up on any local networks (not the Internet), and asks to choose a desktop background. I picked the aurora one. It can be changed any time.
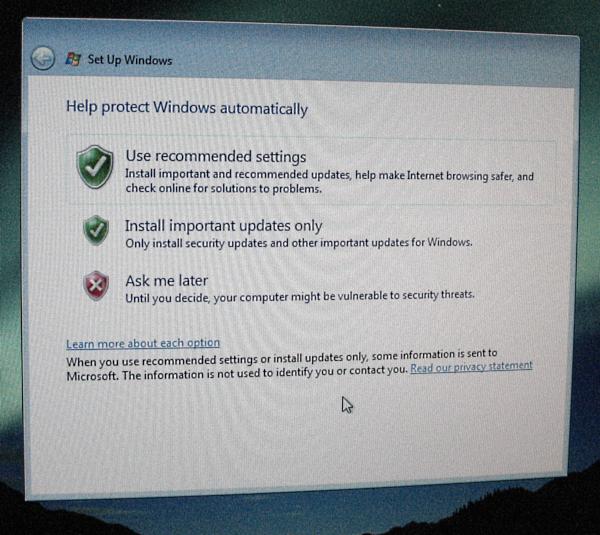
The next box asks whether or not to update Windows automatically. Most people would select to “Use Recommended Settings”. I think I selected “Ask me later” so that I could specify that Windows told me *before* it installed anything, so I could block it if needed.
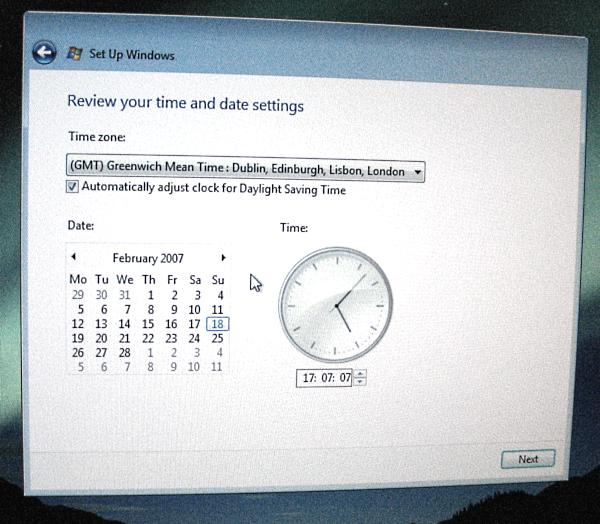
Next it asks for the time settings and the time zone.
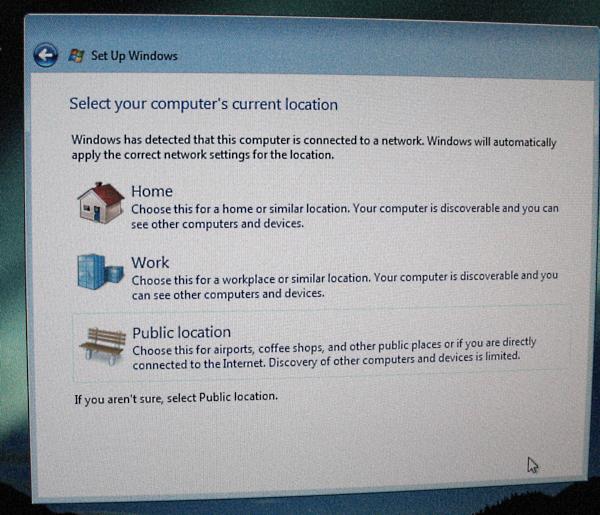
Then the location of the computer, so it can determine whether or not to make it discoverable on a network. The difference between “Home” and “Work” I’m not sure. Lol, I’m not even sure which one I picked. Think it was Home.
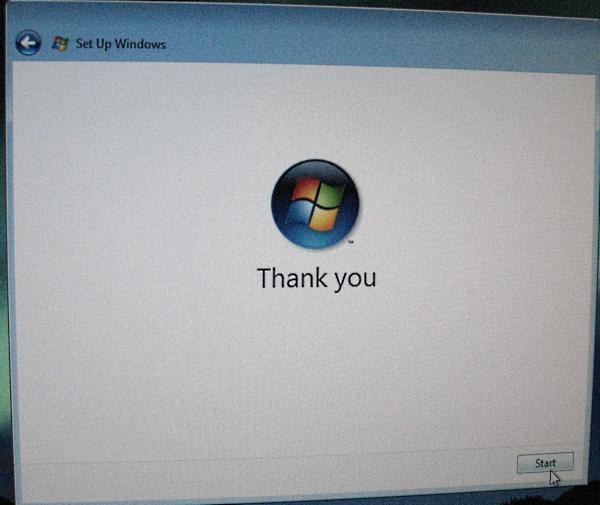
You’re welcome! NOW can we start Windows?

Looks promising, but....
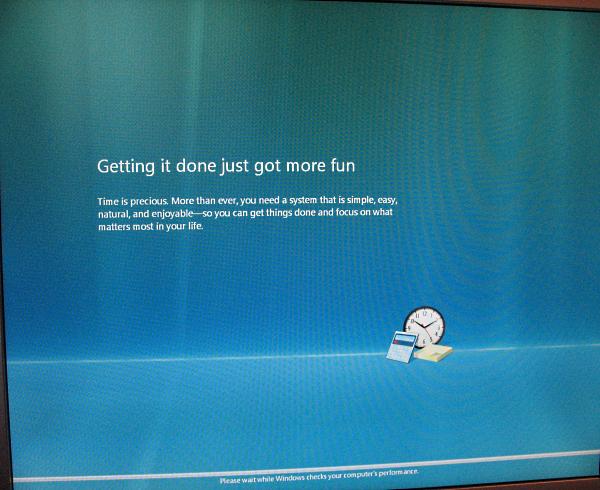
Checking my computer’s performance. Now there’s another 10 minute wait while it benchmarks my graphics, memory and hard drives, to see how powerful my machine is and if it’s capable of handling Vista’s Aero interface.
In case you wondered where the self-advertising of features that XP’s install had went, here they are. While it checks my hardware, it shows a whole lot of slides with a brief description of Vista’s features and how they make life/work “more fun”.
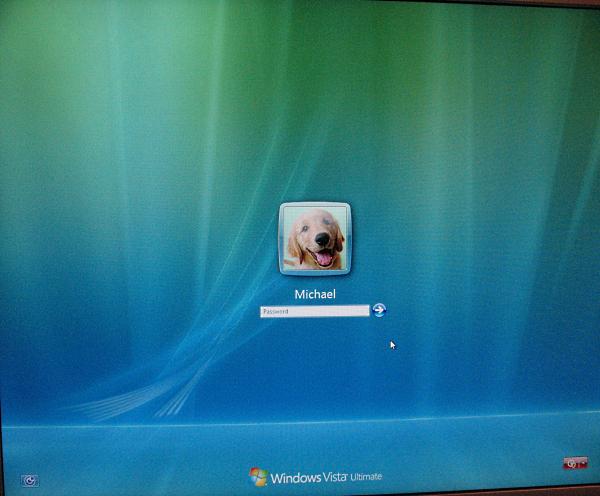
At last! The logon screen!
Here’s where I type in my password, and finally get to my desktop!
At the bottom, the left hand icon is for accessibility options for people who need them. The right hand icon is to shut down the machine instead of logging on. The only uses for this are either that you turned on the machine by mistake, or you selected something wrong in the boot menu and want to go back and reselect it.
Oooh, the suspense.....
By the way, that blue circle is Vista’s “hourglass”. It’s a blue circle that looks like blue glass and a light bit swirls round and round while it’s doing something. Similarly the circle sits next to the cursor when it’s busy doing something in the background, just like XP’s cursor with hourglass.

Yay! Here’s my desktop! All shiny and new and... bare! No “My Computer” or “My Documents” icons. Not even a “Internet Explorer” icon! Just the Recycle Bin on it’s lonesome....awww!

This is Vista’s system tray and “notification area”. Left to right are...
Vista Desktop Sidebar: Has it’s own icon as well as the sidebar itself, so that when it’s behind other windows, you can bring it to the front. By default it’s not “Always on Top”.
Security Alert: Because I didn’t have antivirus installed, it showed the alert icon (yellow now instead of XP’s red).
“Safely Remove”: This is so that any removable drive can be un-mounted before it’s removed.
Windows Automatic Update: New icon, but everything else is more or less the same as XP.
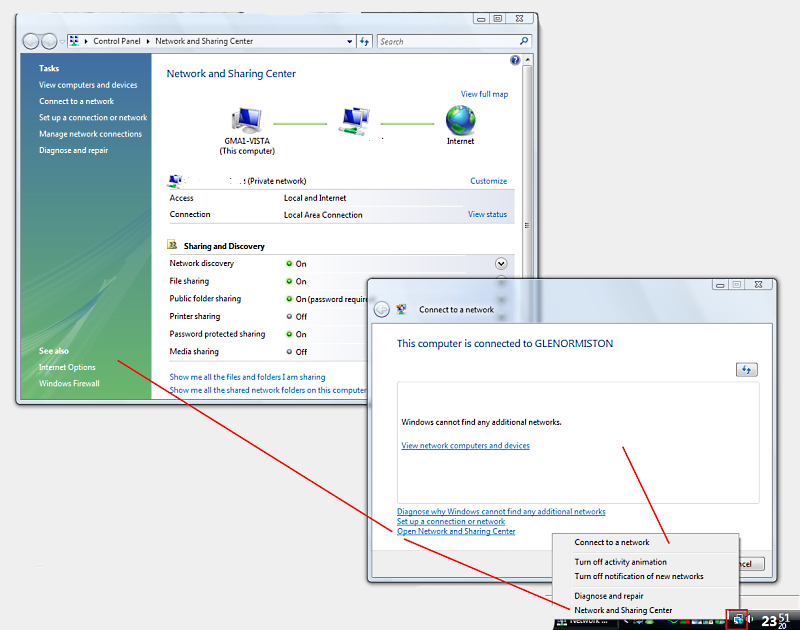
Internet Connection: Shows the status of the network connection. Mine automatically picked up my router.
Volume Control: Don’t bother double-clicking because you get the same single, “Master” volume control as a single click. Right-click and “Open Volume Mixer” gives a slightly more helpful volume control on a per-program basis. Only while the program is open and generating sound can you change it’s volume.
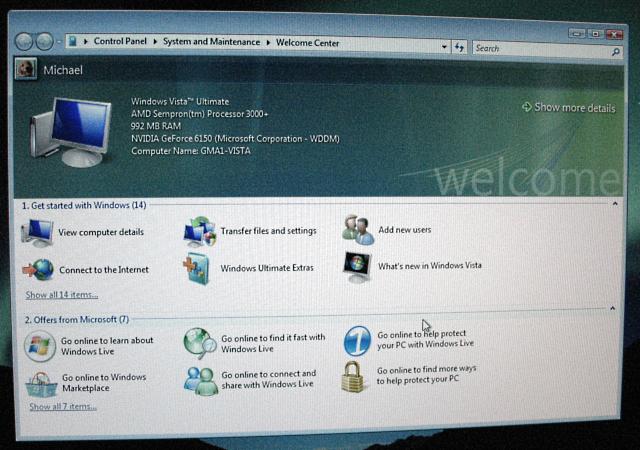
After a short time, the Welcome Center pops up. This shows information about your computer and has links to the most common things a new user would use.
This window will popup every time you start Windows until you tell it otherwise!
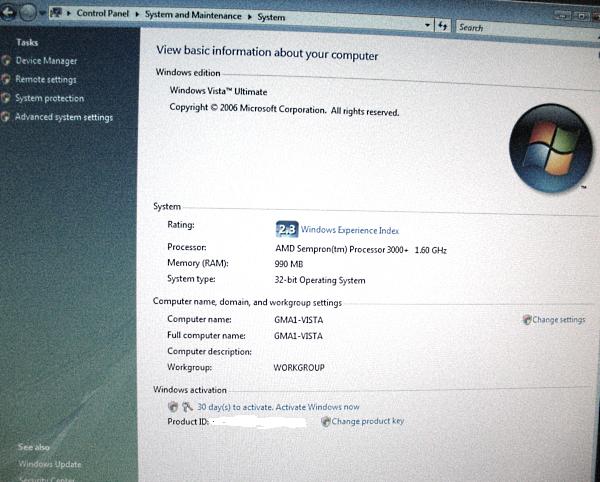
Browsing around the Welcome Center I came across this page that shows basic stuff about my computer. The Windows Experience Index is a number that shows how good the performance of your computer is. It’s determined by the lowest performing area.
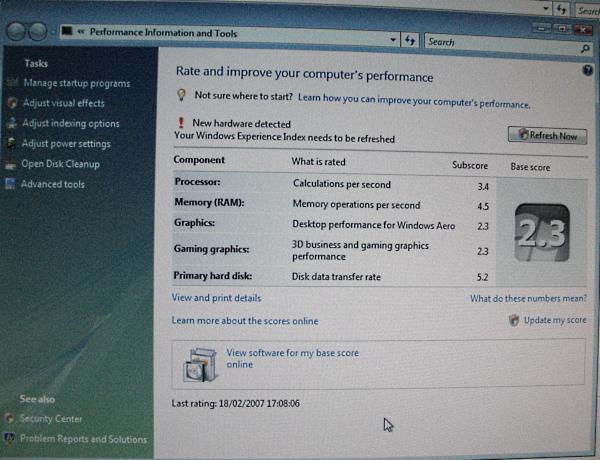
Here it shows that my hard drives have pretty good speeds (the performance rating goes up to 5.9) but it’s let down by my graphics, which are my motherboard’s onboard graphics, so they’re not too bad considering!
I can still run Aero though! :D
I enabled it and it’s nice and smooth, surprising my graphics got a low score. The window transparency on the titlebars and borders is nice, as are the semi-transparent dialog boxes. The 3D task switch is nice the first time you see it, but the novelty wears off after using it twice! LOL.

I still prefer either clicking on the taskbar (with thumbnail tooltips!),
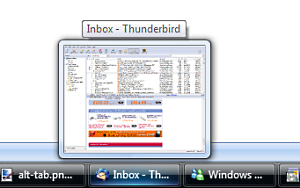
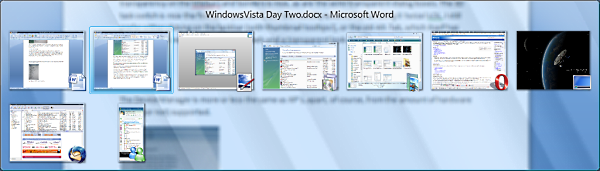
or the old Alt-Tab, which itself has also been enhanced with LIVE thumbnails and a transparent look.
The Device Manager is more or less the same as XP’s, apart, of course, from the amount of hardware that is (or not) supported.
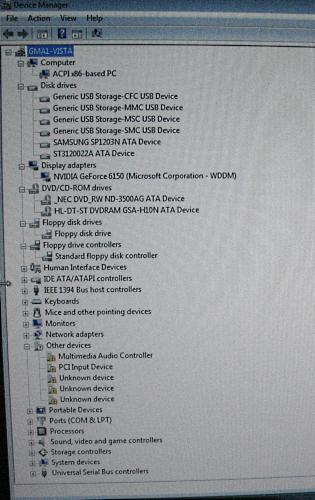
Meh! My soundcard isn’t supported anymore!
Granted, it’s about the only surviving piece of hardware since my 1999 (that’s year, not price!) upgrade of my computer, but come on, it’s a SoundBlaster Live Value!
I tried installing an EMU10K1 driver I found, but it refused to install because I didn’t have the required sound card installed. Boo.
But, I have a backup sound device... my motherboard’s onboard HD sound system! So I have Windows using that as the default. To be honest, the only reason I kept the SoundBlaster installed after my motherboard upgrade was to have the musical keyboard applet to play along to music, without hooking up my old Yamaha (physical) keyboard.
Tempted to get an Audigy/Extigy now, so long as it still has the keyboard!
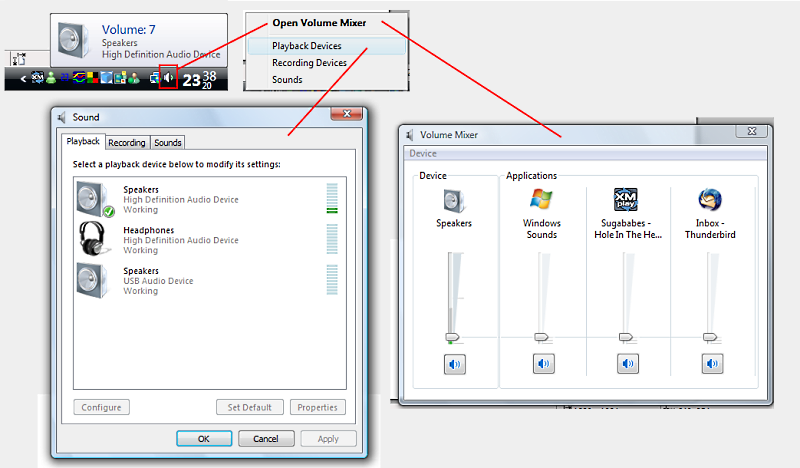
Adjusted the default sound device to point to my Onboard audio, instead of the USB Voip phone it had defaulted to.
So, once Windows was installed and running ok, I set about installing programs and settings.
I set my network name so that it matched mum’s and then we could share files between my computer and hers. My IP address was automatically configured by my router so that my computer always got the same address, to make things simpler for redirecting incoming connections. All I needed to do was set the network name.
With that done, I rebooted, then carried on installing my essential stuff like...
Windows Live Messenger! LOL Then MSG Plus Live for it’s extra features.
Then slightly less important (ha!), AVG Antivirus Free Edition. I’ve rarely received any viruses via email, but some software downloads that I get can have viruses tagged along with them. Essential for everyone! The antivirus program I mean, not the viruses!
Next up was my favourite browser, Opera.
With Opera, I’ve built up quite a profile with my bookmarks and I have the toolbars set out just the way that’s most efficient for me. So after installing the Opera 9.20 classic installer (this bit was important as I was about to find out), I went about copying my profile folder from F:\Program Files.
Here’s where the bane of any Windows Vista user’s life comes in. User Account Control.
By default, the first user to log into Windows is given Administrator privileges, protected by a password. In the olden days of Windows XP, once logged in as Admin, one would expect never to be pestered again asking for Admin rights. You were free to install programs as you chose, copy and delete files at will (unless they were in use, but that’s another issue).
With Windows Vista, although the Administrator account has those privileges, they are not always available for every operation. Whenever a task is performed that requires Administrative privileges, a dialog box pops up asking permission. What’s more, is that unless specified otherwise (either in exe properties or by a right-click --> Run as Administrator), every program runs as a standard user.
The Administrator icon,
So getting back to my install, I had Opera cleanly installed, opened it a couple of times to test it, then closed it and opened up both C:\Program Files\Opera 9, and F:\Program Files\Opera 9.
As I knew the file structure of Opera like the back of my hand, I copied over the contents of my Profile folder. When I dragged the folders across, Windows flagged up saying I needed Administrator Privileges.
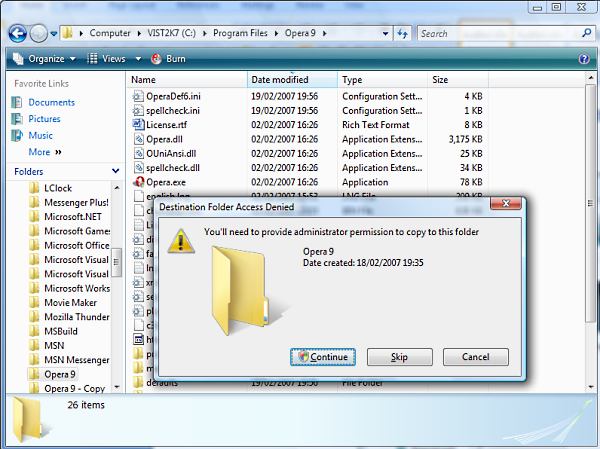
So I duly clicked the Continue button, and the screen went black, then came up a dialog box saying “Windows needs your permission to continue. File Operation. If you started this operation, continue.” with the rest of my desktop behind what looks like a dark pane of glass. So I had to click another button to confirm that’s what I wanted to do.
For one folder, it’s no biggie. However it gets REALLY annoying after a while. It gets worse...
So I had my profile folder copied over. Next was to change my opera6.ini file so that everything that pointed to C:\Program Files\Opera 9 now pointed to F:\Program Files\Opera 9.
So being naive, I double-clicked the .ini file to open it in Notepad, then went through changing the F:s to C:s. File --> Save...
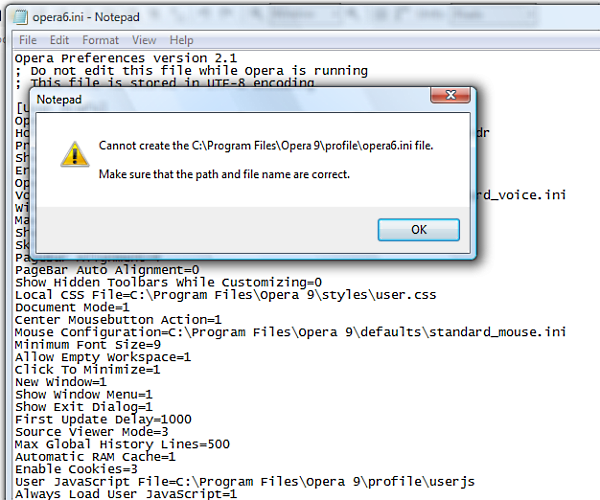
Cannot create the file.
Um...why?
Then it dawned in me... okay, not immediately, but after repeatedly clearing the “Read-only” attributes of the Opera folder in a futile attempt that Notepad would comply.
Then I saved the file in another folder, copied it across to the Opera folder, and after another pair of UAC confirmations, had it in place. Easy(!).
So I opened Opera, and the settings were still the old settings. My toolbar was the default, although my bookmarks were all there. Strange.
After much head-scratching, I googled the problem to see what it could be... turns out that if a program is not run as Administrator, then any files it attempts to write to the protected Program Files folder (even the program’s own folder) get redirected to a “virtual folder”.
So the Opera6.ini file I placed in the Opera folder was being ignored in favour of the one in the virtual Opera folder that was created!
So I set the .exe properties of Opera to always run as Administrator. In fact this became very useful as I have a “Run” box on my Opera toolbar, so every program spawned from that run box would automatically be in Admin mode!
So from then on, to edit an ini file, I ran Notepad from Opera’s run box, then dragged the required file from Explorer into Notepad.
More on Opera in a bit.
I tried to install Java’s Web installer, but for some unknown reason Opera wouldn’t accept it. I have a theory that UAC’s to blame. It worked after installing from the full download.
Here comes some more fun! I installed Speedfan, to monitor my temperatures, and also to turn my fan speeds down slightly to reduce the noise. I also installed WebTemp, which creates graphs from the SpeedFan data, and uploads them to my website. In the event of a sudden system death with a queried thermal problem, I can check the graphs on my site to see what the last reading was.
So anyway, I ran WebTemp and copied the settings .ini files over (going through the same hoops as for Opera, but I was ready this time!), and half of the graphs had no value! No hard drive stats, and going into SpeedFan, I saw that not only that, but it refused to list the drives in the SMART page.
Now, what would stop a program from accessing the Hard Drive stats... yep, lack of Admin Privileges! So into the program files, right-click SpeedFan.exe, Run as Admin...
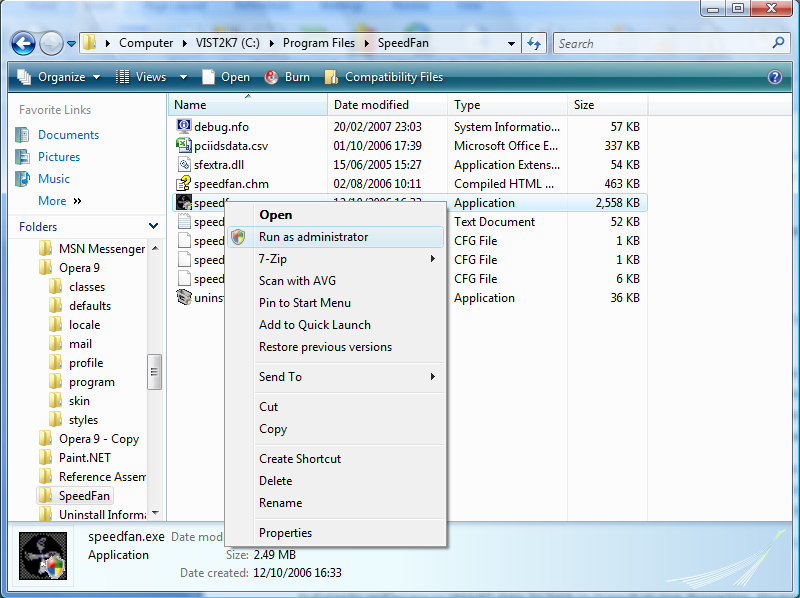
Full graphs and access to SMART data. So back to SpeedFan.exe, Properties, Always Run as Admin.

So far so good...
I installed L8NC_Client, which reports my IP address back to l8nc.com so it can track my latency of my net connection.
So every startup from then until day 3 when I figured a workaround, I get a box popping up saying “Some programs have been blocked from starting”. Why? Because they were set to start on startup, but because they need Admin permissions (and me to click the “continue” box), they were denied and blocked. This happened for Speedfan, Webtemp and l8nc_client.
Argh!
Anyway, I installed LClock, which is basically what the clock on Vista WAS going to be like (when it was called Longhorn, hence Longhorn Clock), but was returned to the boring old standard. To get round reconfiguring it, I just copied the old ini file from F:. All worked except the settings, but I wasn’t too bothered. Back to those in a moment...
I tried installing a tweaking program called TweakVI, so obviously a twist on TweakUI, the tweaking program for XP. However, on running it, I got an error saying “A monitor program has been found running on your machine. Close and remove it from memory before running TweakVI again”. I tried Goggling, and running it as Admin, but still no avail. So I uninstalled it! Sod it! LOL
The first program that actually DID install smoothly, and without Admin hitches, was BORGChat, a program I use to send messages to mum’s computer when she’s not logged in MSN Messenger.
After much googling on the LClock Options problem, someone suggested that the Data Execution Protection was crashing it. This was confirmed in the crash dialog box. So I edited the boot configuration to disable the NX feature of my processor. “RUN (as Admin...of course): bcdedit.exe /set {current} nx AlwaysOff”
On reboot (Day 2), it worked! I right-clicked LClock, and got it’s properties, so I changed the font a bit.Day 2